
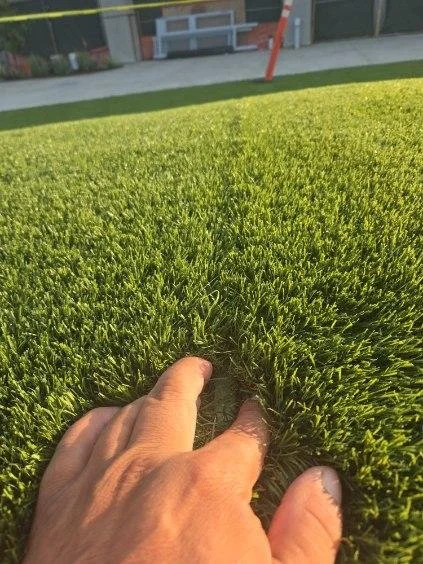
This seam failure was due to improper spacing of the 2 pieces of turf along with leaving the last row of stitches before the ribbons at the edges. You could see the “Mohawk” up the seam.
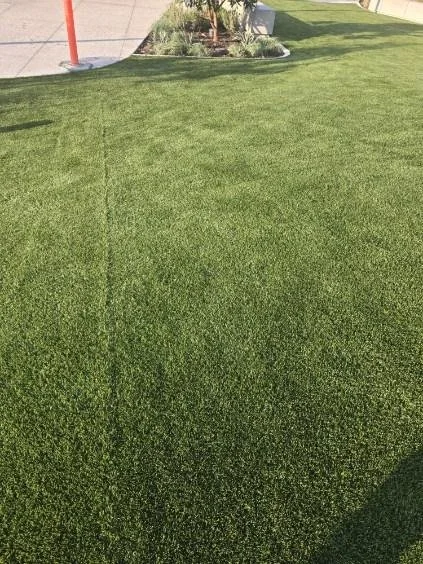
Here the installers improperly spaced the turf panels or allowed the area to be walked on while the glue was drying which caused the panels to move.
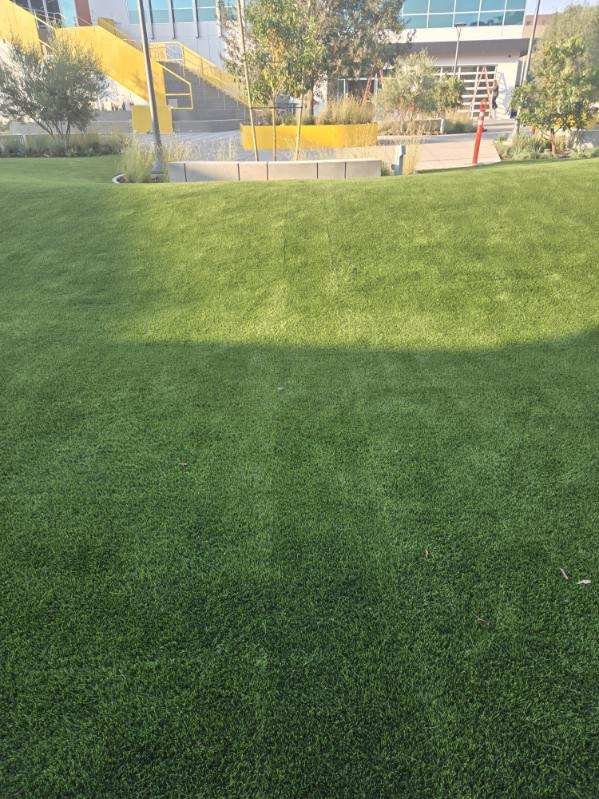
The installers here installed a small patch panel to bridge the gap between 2 turf panels but spliced it too tight. Poor planning now put 2 bad seams where there should of been only one.
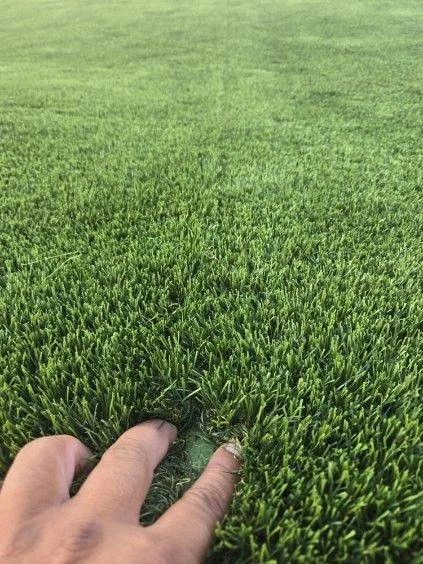
Improper turf panel spacing and improper trimming left this seam very visible.
Our Artificial Turf Seam Repair Process
Every turf problem is different, so the appropriate repair depends on what we find during the evaluation.
Our approach begins with understanding the failure rather than assuming the solution.
1. Inspect the Failed Seam
We begin by examining the affected area and surrounding turf.
Depending on the problem, we look at:
The amount of seam separation
Turf alignment
Turf backing
Seam condition
Adhesive or bonding failure
Seam materials
Infill
Adjacent turf
Wrinkles or movement
The surrounding installation
Potential surface or base issues
The objective is to understand the condition of the seam and determine whether the problem appears localized or more extensive.
2. Identify the Underlying Cause
The most important question isn't simply:
“How do we close this gap?”
It's:
“Why did this seam fail?”
A seam may be failing because of a localized problem, or it may be related to installation conditions, surface movement, material deterioration, or another issue.
Understanding the potential cause helps determine what type of repair makes sense.
3. Prepare the Repair Area
When a repair is appropriate, the affected area needs to be properly prepared.
Depending on the condition of the turf, preparation may involve accessing the affected seam, removing failed materials, cleaning or preparing bonding surfaces, and getting the turf ready for the appropriate repair procedure.
The specific preparation and materials should be appropriate for the turf system being repaired.
4. Re-align the Turf
Proper alignment is an important part of making a repaired seam look and perform appropriately.
The adjacent sections need to be positioned correctly before the seam is repaired.
A technically secure seam that is poorly aligned can still be highly visible.
5. Repair or Rebuild the Seam
Depending on the condition of the existing turf and seam, the appropriate repair may involve repairing the existing joint, replacing damaged materials, or reconstructing a portion of the seam.
The repair approach should take into account the turf backing, existing seam condition, installation, and manufacturer's requirements where applicable.
There is no single repair method that is appropriate for every artificial turf seam.
6. Restore Infill and Appearance
After the seam has been repaired, the surrounding area may need to be restored.
Depending on the installation, this can include:
Replacing displaced infill
Brushing the turf
Blending the repaired area
Restoring the appearance of the turf
Addressing surrounding disturbed areas
The goal is not simply to close the seam, but to leave the repaired area looking and functioning as naturally as possible.
7. Final Inspection
The repaired area should be inspected to confirm that the turf is properly aligned and that the repair addresses the identified problem.
If additional issues are discovered during the repair process, we can explain what they are and what options may be available.
How It Works:
Send us photos or call. Many problems can be assessed from good photos.
Remote assessment. We tell you what we think is going on and whether a site visit is needed.
On-site diagnosis. We confirm the cause, whether it's the seam itself, the base, the infill, or the layout.
Fix it with your crew. We work beside your installers so they learn the correct technique on the job.
Prevent the next one. Your crew leaves knowing how to avoid the problem on future installs.
Contact Us